Beetroot & Jerusalem Artichoke Salad

Hump Day fine dining!!! I should have spent the evening getting my ass kicked at Fierce45 (Lagree method = pilates on steroids, google it), but instead, B and I took a stroll down to Pearl Street and bought a bottle of wine. Because that’s how we cook.

Since moving to Colorado I have not been super impressed with the farmer’s market scene, especially when I scroll back through photos of produce from the Union Square farmer’s market (I’m referring to NYC, in case you’re not in the know). I miss those mountains of picturesque rainbow carrots, greens and the stand with the garlic. And let’s be real, the Cherry Creek market has become a) a gathering of food trucks and b) a hassle when you need to go to Bed Bath & Beyond (only when there’s enough time). https://www.youtube.com/watch?v=VASzXVS9pTw

And then my dad took me flying this weekend (see below, that’s the SuperCub 5-7-Lima). One of his frequent stops is the family farm, where my Uncle John lives. Apparently, my dad buzzes my uncle (flies really low, close to his house), and by the time my dad circles the plane around and lands on the well-made dirt runway, my uncle, aunt, and their lovely puppy show up in a 4-wheeler, ready to cart your ass either to their house, or the big garden.  What lovely service, and accommodating hosts! 🙂

The big garden. I am such an idiot. I come from a long line of farmers. My uncle John still lives on the Cordes farm. For years, they have worked on this glorious garden, and my dad brings back more produce than you can shake a stick at. I felt so ashamed that I’d forgotten this wonder of nature that my family worked so hard to create. Rows of corn, peppers, potatoes, beets, green beans, herbs, carrots, cucumbers, watermelons, squash. Literally anything you could want. Jesus, pull your ass out of your head, Katie.

I have a generous family – I fly in, get to raid the garden without having put in a lick of work, load the produce into the SuperCub, and fly back to Denver.

So today I decided to use the beets I came home with. Googling Mimi Thorrison (I may have been at work when I did this), I came across the below recipe for a beetroot and Jerusalem artichoke salad.

Beetroot & Jerusalem artichoke salad

serves 4

Ingredients

2 large beetroot peeled & cooked

6 small Jerusalem artichokes (topinambours), peeled

½ head of red cabbage

2 shallots, sliced

A few sprigs of chives, finely chopped

4 slices Bigorre black pig bacon, finely sliced (alternatively, if you can’t find this variety, choose a good-quality bacon)

Olive oil

Balsamic vinegar

Coarse sea-salt & black pepper

Directions:

Slice the beetroot (peeled and cooked) into ¼ inch slices.

Place the ‘Bigorre’ bacon slices on a frying pan, pre-heated on a medium heat. Cook on both sides until crispy and golden. Set aside on kitchen paper to absorb excess fat.

Pre-cook the Jerusalem artichokes in salted boiling water and 1 teaspoon of bicarbonate of soda (a little trick I learnt to ease digestion) for 10 minutes. Drain and set aside. Slice into rondelles.

Slice the red cabbage finely and place in a bowl. Season with salt and pepper and drizzle with 1 tablespoon of olive oil and a 2-3 teaspoons of balsamic vinegar. Set aside.

Heat 1 tablespoon of olive oil in a pan on a medium heat. Cook shallots for 3 to 4 minutes, add the Jerusalem artichoke slices and cook for a few minutes on each side until slightly golden. You want to keep them al dente. Set aside.

In the same pan, add a little bit of olive oil and gently cook the beetroot slices on both sides for 2 minutes.

Place the beetroot slices on a plate, add the Jerusalem artichokes and shallots. Scatter the red cabbage all over, sprinkle finely chopped chives and place the slice of fried ‘Noir de Bigorre’ bacon (or a lovely piece of bacon) on top. Just before serving, drizzle a few drops of olive oil and balsamic vinegar. Season to taste.

http://mimithorisson.com/2013/12/09/almost-christmas-lunch/

The blog post associated with this recipe is lovely – cute family living in France, going out to pick a Christmas tree, decorating it, and effortlessly sitting down to dinner.

Enter moi.

Nothing about this is hard, but the time for cooking the beets was NOT included (at least an hour), and in an effort to reduce heat and conserve dirty pans, I used the same pot to cook the beets, as well as the Jerusalem artichokes. Big mistake. Big. Huge.

Image result for big mistake huge

Okay, it wasn’t that bad, but it took ages to get everything ready.

Pretty ingredients with a pretty glass of Rose ❤

Look at those beautiful, Cordes-grown beets!!! YUM.

So what I loved about this recipe was that I got to use my beets, and I got to learn about Jerusalem artichokes. WHY IS THIS THE FIRST TIME I HAVE EVER EATEN JERUSALEM ARTICHOKES?!?! As an artichoke aficionado, my mind is boggled that I have never had the joy of these babies gracing my taste buds with their presence.

That said, this was a weird salad. I really do not understand the addition of red cabbage. I’m guessing it was an attempt to balance the salad, but I think we’d be better served with the beetroot and the Jerusalem artichokes on a bed of arugula or mixed greens. So strange. Delicious, but strange. Also, I”m not sure if it was a function of the fact that I got my chives from Sprouts, but they seemed a little lost. And definitely you do not need to add more olive oil and balsamic at the end, as the recipe suggests.

Bacon, of course, is delicious on everything.

Paired with this lovely rose, and a bit of light reading #Francophile #iLoveMimi #wildwomen

Happy Hump Day lovers. xx

Summer Gazpacho

Something that has been gnawing at me lately is that since I’ve moved to Denver, I spend little to no time in the kitchen, unless it’s to open a bottle of wine, make coffee, or serve up charcuterie and cheese. Shoot. I’ve also noticed that I don’t eat very well as a result, and perhaps have an ever expanding waistline. Double shoot.

So today I resolved that this would change, that I’d set aside single girl dinners comprised of cheese and some kind of salt-cured meat or sausage (sometimes an avocado makes the cut), and start thinking about what I”m putting into my body, while at the same time taking advantage of the late summer produce (tomatoes, Palisade peaches!) that I love.

Except it’s too hot to cook.

My cute little 1926 bungalow is not so cute when the mercury rises and my swamp cooler doesn’t really cool the whole house, notably the kitchen (my bedroom, however, is delightfully cool. Does anything else really matter?). I began browsing Yotam Ottolenghi’s Plenty, which, for the uninitiated, is a beautiful collection of recipes around vegetables. Lots of choices, but many involved the oven and the stove (oh, and about one million ingredients). As I made my peace with this, and started slathering on the antiperspirant (does it make a difference if you’ve put it all over your body?), I started having visions of sitting in a plaza in Seville with my dad, as the flavors of tomato, garlic and vinegar danced across my taste buds, and flamenco music drifted in and out of hearing range.

Gazpacho. The soup you don’t have to cook and is served cold. I realize I just wrote “that you don’t have to cook”, by which I mean you don’t have to use heat to prepare, and since I’m not sitting at the Sushi Den bar waiting for jalapeno hamachi, making gazpacho still counts as cooking here, folks. It’s a good one coming out of the non-cooking gate, as all you need to do is chop up some veggies and whip out the immersion blender.

Tonight I used Mark Bittman’s recipe from How to Cook Everything. I’ve never made anything of his that is bad, but he really has only the basics; this recipe lacked complexity. To his credit, he does title the recipe “Gazpacho, Fast and Simple”.

Ingredients:

  • 2 lbs tomatoes, roughly chopped
  • 1 medium cucumber, peeled, and chopped
  • 2 or 3 slices of bread, a day or two old, crusts removed, torn into small pieces
  • 1/4 cup extra virgin olive oil, plus more for garnish
  • 2 tablespoons sherry vinegar or red wine vinegar, or more to taste
  • 1 teaspoon minced garlic
  • Salt and freshly ground black pepper

Instructions:

  1. Combine the tomatoes, cucumber, bread, oil vinegar, and garlic with 1 cup water (I did not add 1 cup water, it really was closer to a quarter, but this is up to your personal taste of what texture of soup you’d like) in a blender, or a bowl, if using an immersion blender. Process until desired smoothness.
  2. Taste and adjust the seasoning. Garnish with olive oil.

I prefer using some kind of peppers, but this still turned out really good, and hit the spot. I’m looking forward to the leftovers. Many people garnish with more diced tomatoes and cucumbers, in addition to the olive oil. Tonight I used a little hard boiled egg.

Another note on Bittman’s recipe – he says to serve immediately, or within a couple of hours – I think he’s crazy, the flavors intensify the longer it sits together in the fridge, it’s awesome!


The Summer of G&T’s

I have a summer goal: learn to make and enjoy a good Gin and Tonic.

Picture this: After a long day at work, with the sun low in the sky (I’m imagining a Colorado sunset, which really is the best), you arrive home to a joyous puppy and the back yard beckoning your to come have  a sit. As you unlock the back door, you look around your yard and realize that the serenity you’ve worked long and hard to create (okay, your mother has also worked long and hard, too) is at risk of going to hell if you don’t get those weeds pulled. What’s a girl to do? You make yourself a nice gin and tonic, put on some yoga pants, and casually sit outside with a trowel in one hand, and a G&T in the other. #summergoals.

But here’s the deal – I am not a gin connoisseur, I’m not entirely sure I even like them (probably haven’t found the right gin), and a quick google search indicates that there is about 500 million ways to make one, each recipe claiming to the best (add club soda to your tonic water, 2oz gin to 3 oz tonic, 2:2 ratio, garnish with a lemon, a lime, a cucumber!). I intend to make this a summer of experimentation, to find a good recipe, find the gin that warms my heart, and maybe I’ll pick up this blogging endeavor again, and bring you guys along for the ride! Oh, and have a stunning garden of course :).

In the name of being scientific, I am going to try to taste as many gins as possible. It turns out that Morgan’s liquor store (yes, the one all the DU kids use their fake IDs at, and they don’t ask for mine anymore. tear.) does not carry a lot of mini bottles of gin, only Tangueray, and Bombay Sapphire. I don’t have it in me to run around looking for mini bottles, so I also committed to a bottle of Hendrick’s, at the recommendation of two friends, one of which who has age on their side, the other, a love of G&Ts. I figured if it’s awful and I hate gin, at least I have something nice to offer guests when they drop by Chez Katie. The drink will certainly be nicer than the $20 jelly plastic Target chaise lounges I offer them as seats.

I am also planning on testing various types of tonic water – Morgan’s isn’t particularly high brow, so tonight we drink Schweppes (diet) Tonic Water (my other summer goals are a bikini body, so trying to cut back on calories where I can). I know there are some others out there like Fever Tree and Q Tonic, so I promise to try those too.

Tonight’s G&T:

  • Ice in glass first
  • 2 oz. Hendrick’s Gin
  • 3 oz. Diet Schweppes Tonic Water
  • Garnish – cucumbers (munchers, I didn’t have a real one. And they may be on their last days)

IMG_0087

Result — pretty damn good. Happy I started with the Hendrick’s, I was afraid that if I started with crap gin I wouldn’t want to continue this project.

IMG_0088
Also, shoutout to Erika for the excellent glasses.


Pasta and bean soup

One morning lying in bed I was perusing Facebook (as one does, while you delay the inevitable) and I saw a post for One-Pot Pasta e Fagioli (Italian Pasta and Bean Stew). “One Pot!” I thought to myself, “that means it’s really easy to throw together!” So after perusing the recipe and noting a hearty helping of bacon and pasta and spinach, I took a screen shot of the recipe and saved it up for a later date.

Sometime later, we had a snowstorm come through and it looked like the following day would be spent working from home. What a perfect day for soup! I pulled the little recipe I’d saved up out of my Photos album (ok, I admit it, I don’t have a special recipes album, all my photos are in one big generic album, but wouldn’t it be cool if I did? Maybe I will start one…). Skimming the recipe on the subway, I realized that I’d need to soak some cannellini beans overnight. Lucky me that I noticed this ahead of time! No seriously. I have penchant for stopping my reading of a recipe after the ingredients list.  I visited my lovely new Whole Foods at 3rd and 3rd (3rd Street and 3rd Avenue in Gowanus – the first WF in Brooklyn!) and stocked up on all the ingredients. Arriving home, I followed the directions and started soaking the beans. What an adventure! I’d never done this before! It felt so homemade and slightly rustic. A real DIY moment.

The next day arrived, and as predicted, snow kept me home. But work was busy, no time to cook soup, particularly as I read further in the recipe and noted that the beans would need a further two to two and a half hours to cook after they’d been soaked! The next day I certainly did not have time after work for such nonsense, and Friday evening – well no one wants to cook that much on Friday, between going out for dinner or collapsing exhausted on the couch with a glass of wine and rolling through what’s been recorded on your DVR from the prior week. Saturday was lost to errands (and/or brunching and socializing) and Sunday was a write-off given my pounding head.

But what was I to now do with a pot of beans that had been sitting on the stove in a pot of salted water with a lid on for days? The thought, honestly, was terrifying. After joking about it with my brother on FaceTime, I took him with me (virtually) to investigate what I’d created. It actually wasn’t as bad as I thought. There were some weird foamy bubble layer on the top, but no noticeable signs of mold or decay! Just a really stinky cheese smell (I suppose that given cheese is just moldy milk, there was probably something funky going on). Cleaned up nice and easy peasy, I counted my blessings. But I still had no soup. Matt and I debated whether or not the beans were fine, but concluded that starting over would be less painful than any food poisoning that could arise from the super soaked beans.

Keeping in mind that I’d bought the slab bacon and the veggies needed for the soup, I needed to try again, and soon. I decided that instead of waiting on a damn pot of beans to soak overnight, I’d just used canned ones! They are cheap and still just as delicious. Plus canned beans are at your disposal, ready when you are. A Google search indicated that I’d want 3 – 4 cans to cover the 1-pound of dried beans the recipe called for. I bought some shortly thereafter.

Which brings me to today, two weeks later. You might be incredulous that the vegetables I purchased so long ago are still okay! I was too. The celery, meh, it was maybe a bit floppy, but you cook it to become soft, and the kale? That’s a pretty hardy leafy green. And my 1980’s refrigerator with the tin wrapped around the light bulb seems to be not as crappy as I thought it was, at least in terms of keeping things fresh!IMG_2602

So here’s the recipe as I saved it down, from TheKitchn.com

Serves 8 to 10

For the beans:

8 cups water

2 1/2 tablespoons salt, divided

1 pound dried cannellini beans

For the soup:

1/2 pound (5 to 6 pieces) thick-cut bacon , diced (or substitute 1 tablespoon olive oil for vegetarian version)

2 large yellow onions, diced

3 celery stalks, diced

4 garlic cloves, minced

1 cup white wine or water

1 bay leaf

1/2 pound pasta

5 thyme sprigs

10 ounces baby spinach

2 teaspoons salt

Pepper to taste

Combine the water and 1 1/2 tablespoons salt in a large mixing bowl and stir to dissolve the salt. Add the beans, cover the bowl, and let stand at least 6 hours or overnight.

Preheat the oven to 325°F.

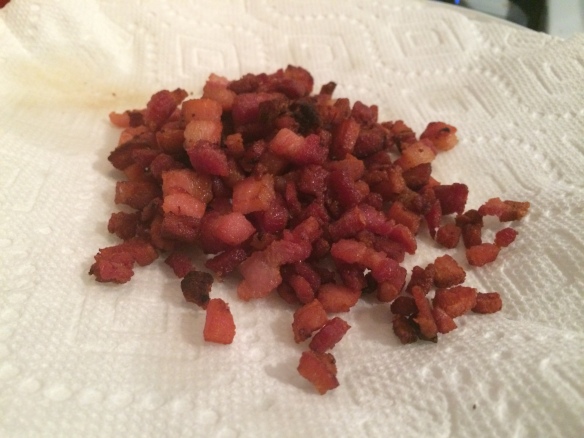
In a heavy stock pot or Dutch oven over medium heat, cook the bacon. Once all the fat has rendered, remove the bacon with a slotted spoon and drain on a paper towel-lined plate. Pour off all put one tablespoon of bacon fat. Cook the onions slowly with 1/2 teaspoon of salt start to caramelize and turn golden brown, 15 to 20 minutes. Add the celery and cook just until the celery is softened, about 3 minutes. Add the garlic and cook until fragrant, about 30 seconds.

Remove half of the onion mixture and reserve with the bacon. Deglaze the pan with one cup of wine or water, scraping up any brown residue that has formed on the bottom of the pan.

Drain and rinse the beans and pour them into the pot with the remaining onions. Add the bay leaf, 1 teaspoon of salt, and enough water to cover the beans and onions by 1 inch. Cover the pot and transfer to the oven. Cook for 1 hour, then begin checking the beans for doneness. Check the beans every 15 minutes until they are completely soft and creamy. (This can take up to 2 1/2 hours depending on the age and exact variety of your beans.)

→ Make-Ahead Tip: At this point, the soup can be chilled and refrigerated for a day or two before serving. The soup (or a portion of it) can also be frozen for up to three months.

Set the pot of cooked beans over medium-high heat on the stovetop. Add the bacon, reserved onions, thyme, pasta, and 1 teaspoon of salt. Cook, stirring occasionally, until the pasta is al dente. Add more water if necessary so the pasta is submerged.

Add the spinach to the pot and stir until it is wilted. Remove the bay leaf and the thyme stems. Taste and add more salt and pepper if desired.

This stew will keep for one week refrigerated.

But I made some adjustments. As I mentioned before, I swapped out the overnight process of soaking the beans and cut to the chase – canned beans. It also cut out about 2.25 hours of cook time in the oven; I kept my pot on the stove the whole time. I’m a busy lady – I ‘aint got time for that! Also note that “One-pot” does not necessarily mean easy, it just means one pot. But hopefully the modifications I’ve made to the recipe can guide you to make this actually quite delicious soup without you feeling like you’ve lost years of your life to it.

So – skip the bean soaking and the pre-heating of the oven and proceed straight to the bacon. Do not pass go, do not collect $100. You shouldn’t be too sad about the $100 though, you’re about to cook slab bacon. YUM! I might suggest hiding the bacon tidbits when you’re done and have taken them out of the pot – their quantity can quickly diminish if you’re a snacker. Or even if you like bacon at all.IMG_2595 IMG_2597I did use two onions – I thought that was too much, but it ended up just fine. Similarly with the four cloves of garlic – the flavor is great, not too intense. I do love garlic, so for those of you who are a bit sensitive to it, maybe reduce it a little. Embarrassing as it is, I didn’t have any white wine on hand and felt that deglazing with water was… not my first choice. I used chicken stock instead. If you do the same, keep in mind that you’ll want to reduce the amount of salt you add as you follow the recipe.

I added my rinsed canned beans (Woot! Life hack!) and kept the soup cooking on medium high for about thirty minutes with the lid on. You could probably reduce that by about half, as by the end of the whole process my beans were VERY creamy. IMG_2598

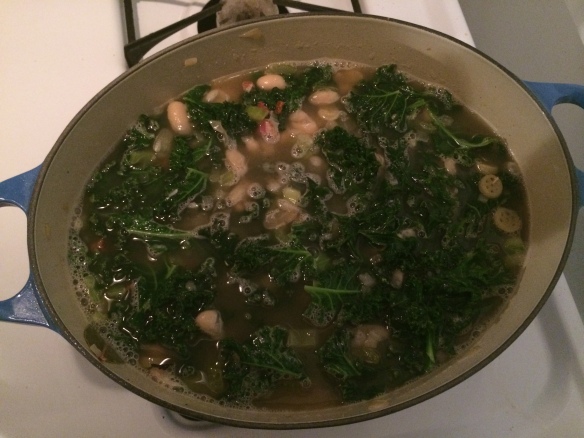
I then added the remaining ingredients, and because I chose to use kale, I added it then, knowing it’d need more time to soften than if I’d used baby spinach.IMG_2599 IMG_2600

Why kale you ask? It’s not because it’s the trendy, popular green, shockingly enough! Firstly, I wanted a heartier, more textured green in my soup to offset the squishy beans, and limp spinach, while good in other dishes, sort of made me less excited about this soup. Secondly, it’s about a billion times cheaper than baby spinach. Or even than grown up, bunched spinach. Two bunches of kale is the perfect amount.

So that brings me to my last modification. If you go to TheKitchn.com and search for the recipe (I couldn’t get the link to work), you’ll notice that they used a very delicious looking Cavatappi pasta shape. I used artisanal local pasta. I do live in Brooklyn, after all. Plus they are wagon wheels. I must have been channeling my inner five year old as well.

After adding the remaining ingredients, I let the pot to cook until the kale and pasta were satisfyingly tender, seasoned with a little ground pepper, and voila! I have soup for about a week and a half! Bon appétit!!

IMG_2601

Kale fail

I don’t care if people say that kale, similarly to bacon, has been over done. Who cares? They are both delicious – that’s why people use them all the time! Last night I made a really nice kale and squash soup, and this morning was really keen to use the leftover kale. It’s healthy (seriously, I’m pretty sure I can feel the antioxidants chasing cancer away) and I didn’t want to forget about it in the fridge over the course of the next week only to find it in a frightfully brown state.

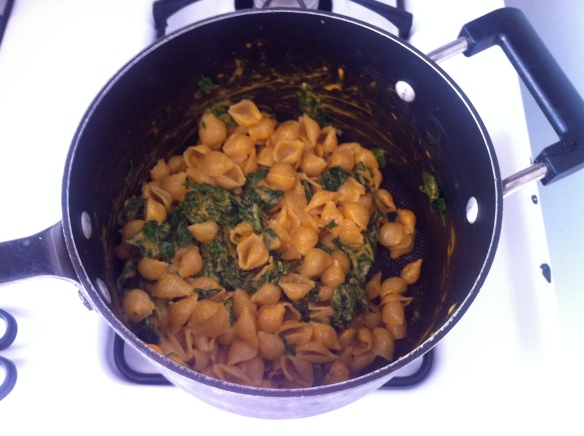
But what to make? The normal uses of kale drifted through my mind – kale salad, chips, sautéed with garlic… But then my thoughts stopped at the box of shells and cheese that has been taunting me for a couple of weeks. What’s not to like? Cheese? Good. Pasta? Good. Kale? Gooood. And maybe the healthy-ness of the kale could offset the plastic cheese!

Such good intentions. Such an epic fail. The kale clumped together, a ball of green glued with sticky yellow/orange cheese. The taste was reminiscent of those Brad’s Raw Leafy Kale Nacho chips, which, as you may have guessed, aren’t exactly delicious. Not exactly spit them out gross, but not good enough to make the mistake of eating them again.

The bright side? Since the kale didn’t really mix into the mac and cheese, I just pulled it out and had normal shells and cheese for lunch. Haha. Sad.

IMG_2357

Cooking school! Weeks 1 and 2!

As some of you may or may not know, I’ve started a 15 class cooking course. I’m taking it at the Institute of Culinary Education and I started last weekend. It’s a medium between the recreational courses and the year long professional course. And LOTS cheaper! 🙂 I thought I’d chronicle the course as I go, showing off my photos!

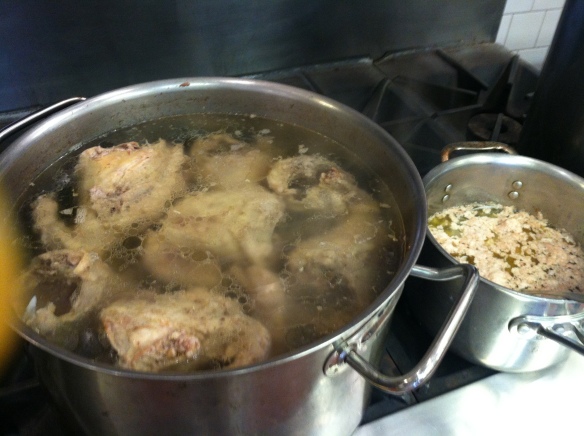
Class one was knife skills. We learned a couple different cuts, and some basic info, such as the ratios for mirepoix. We chopped up potatoes into medium dice, (1/2”x1/2’x1/2’) but to get there you have to cut your potato into a rectangle, but it lengthwise to make tranches, and then cut the tranches in half to make four batons. Then cut into cubes. It’s really tricky and you end up with heaps of potato scraps. We were told the ones we were making were going to go into mashed potatoes for another class (which is what is done in professional kitchens), but I really think that was the same when your parents tell you your dog is going to live on a big farm.

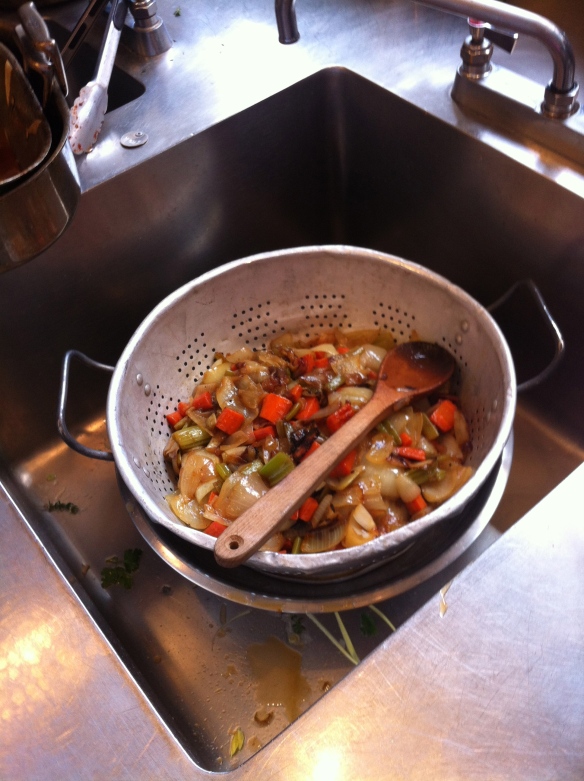
We learned how to cut an onion into medium dice, (it’s tricky!) and worked on carrots and celery for the mirepoix. Mirepoix is the flavor base for many stocks, and is usually comprised of 50% onion, 25% celery and 25% carrot.

IMG_1758

We also made tomatoes concasse, which is tomato that has been peeled, seeded (seeds and skins removed), and chopped to your desired size. We used our tomatoes for a salsa.

IMG_1742

Class two didn’t seem as successful for me, and luckily was the preparation of stocks and fish fumet, ie some chopping and waiting around. Why was that lucky you ask? Well a sneaky carrot rotated while I was chopping it, and I managed to slice out the state of New Jersey out of my little ring finger. Chef Ted bandaged my finger and I put on a finger culot and a glove and tried to go back to chopping. After what seemed like ten minutes later and the finger culot had a puddle of blood, Chef Ted made me sit out from chopping with my hand over my head. I didn’t miss too much!

IMG_1759 IMG_1754 IMG_1755

Class three we learned the art of sautéing and pan frying. Things are getting good – we are making SO MUCH FOOD and it’s delicious and we get to eat it and take it home!! We made:

Sauted spinach. I learned that you don’t add the garlic to the oil first, you need to add it when the spinach is almost done, else it will burn.

IMG_1773

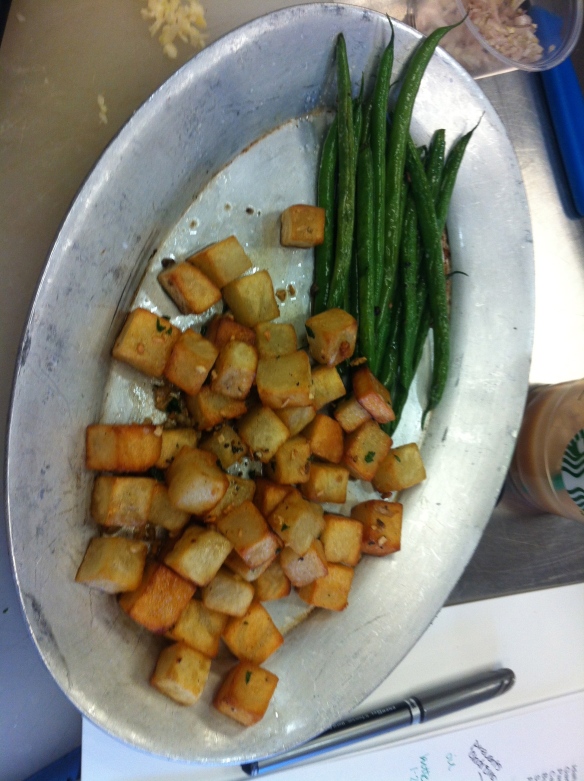
Blanched and sauted haricot verts. One guy saw the green beans and asked where the haricot verts were. I mean, if you can’t operate Google… I hope he doesn’t ever read this… I learned that you can keep the eyelashes on, just tear off the stem bit.

Pommes persillades. Parsley and garlic potatoes. I made mine with more garlic and less parsley. Okay, I only used a teeny bit of parsley. These chefs sure do like the stuff!

IMG_1765

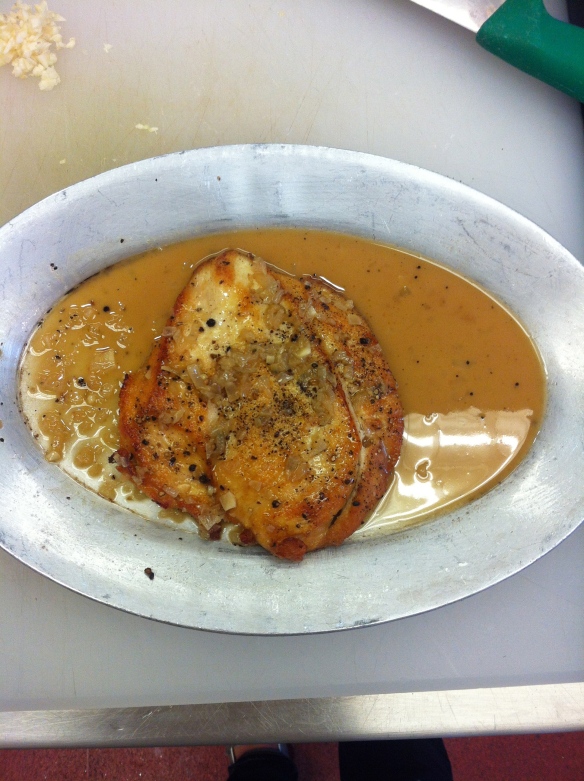
Sauted chicken breasts with a white wine pan sauce. OMG this was divine. The sauce was so fragrant and I was told I cooked my breast just right. Yay go me! It was a beautiful breast. I learned that when you’re cooking a chicken breast in a pan, flip it over, cut a line down the middle, and then cut flaps out to make the chicken breast not only bigger, but all the same thickness. And then we got to pound it out!

IMG_1768 IMG_1771

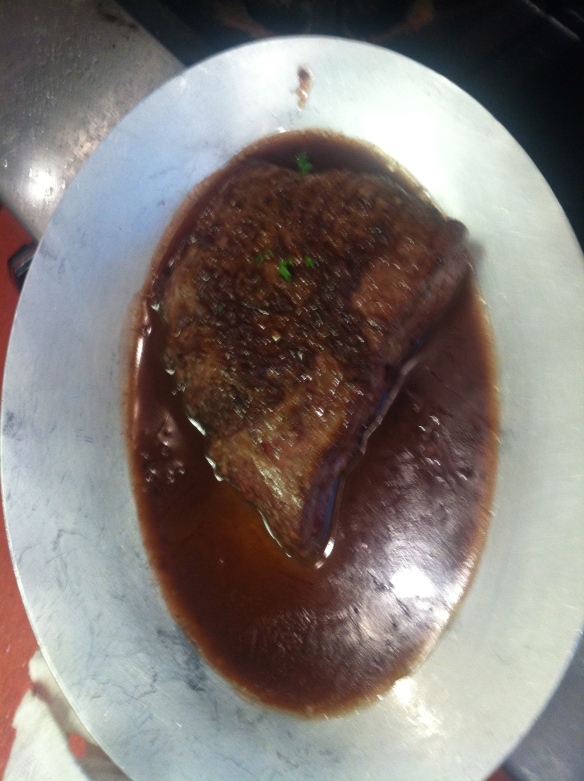
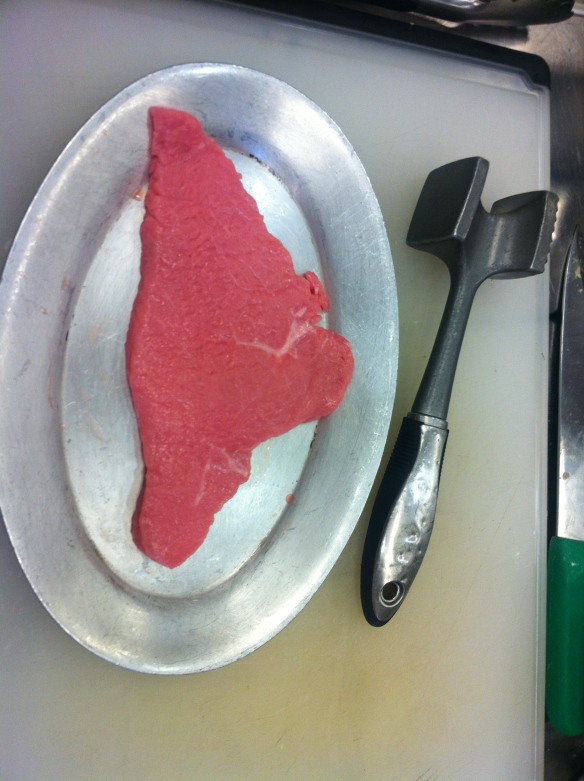
Flank steak with a red wine pan sauce. Yum yum yum. So I learned that when you put your protein down in the pan you can’t move it for about a minute, as you need the proteins in the meat to set (the Malliard reaction needs time, I’ve been reading about it in McGee’s On Food and Cooking), otherwise you’ll tear the meat. I also realized I need to not get so enthusiastic that I pour my sauce all over the meat before plating. Oopsies!

IMG_1772

Weiner Schnitzel (pan fried veal cutlets). Oh wow this was so delicious!! And I had a really great fry on mine! Yayyy. I’m not sure what I learned specifically, but it was fun to tenderize the cutlet and do the standard breading procedure. One thing to pay attention to is that when you are tenderizing, you need to make sure that the plastic wrap isn’t tightly wrapped around the edge of the meat, otherwise the veal will have nowhere to go when you pound it. Also, once it’s breaded, you should fry it right up, don’t let it sit too long.

IMG_1775 IMG_1777

Today, class four, was grilling, and I had a ton of fun, and all the things my dad ever taught me about grilling fell into place as to why we did it. I think I did him proud today, all my meat and fish was grilled perfectly. Chef told us to set your grill up in zones so that there is a hot zone, a medium zone and a luke-warm zone… i.e. why Dad always told me to pile the charcoals in one side of the grill and sear the meat there first, then move it over to the cooler zones to finish cooking.

We made a ton of food:

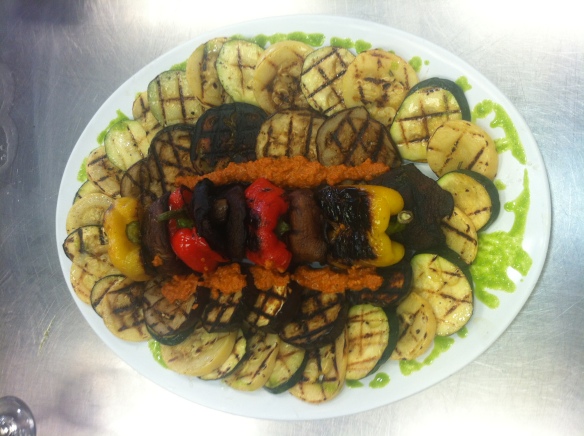
Grilled veggies (after being marinated), served with Romesco sauce and our salsa verde.

IMG_1797

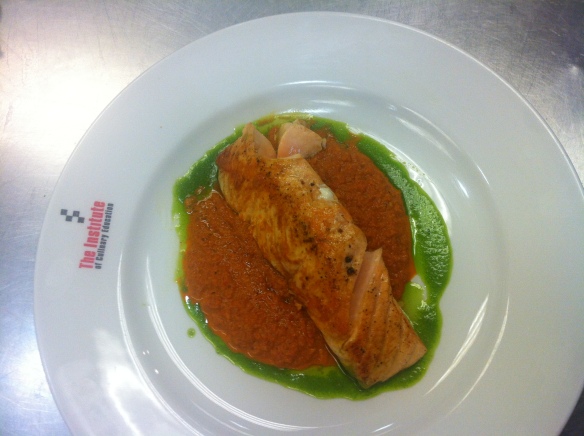
Grilled salmon with a salsa verde (a basil/garlic/olive oil/caper sauce). My salmon ended up okay, but I almost wrecked it by separating the skin from the filet, but it ended up being cooked really nicely, translucent in the center, you can see it in the second photo. My plating skills need a little work though. 🙂 I even ate it, and enjoyed it (I prefer my salmon raw)! The salsa verde was delicious, nice basil flavor with the fish.

IMG_1794 IMG_1795

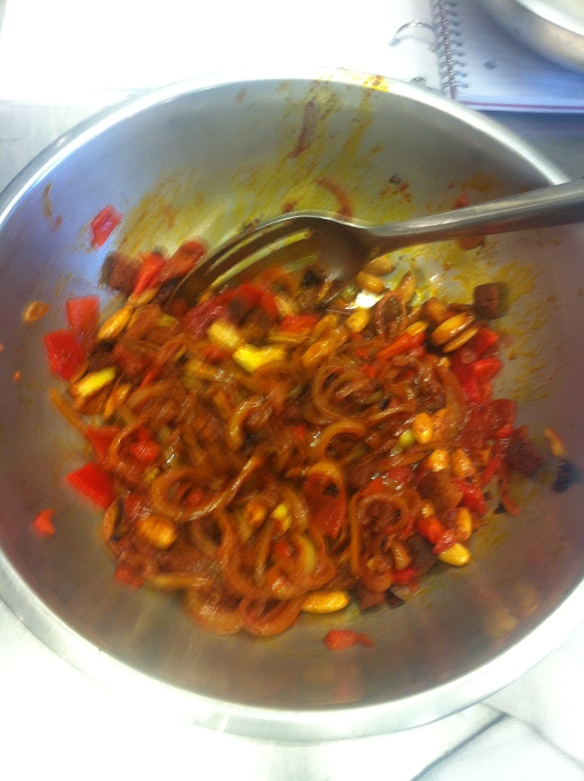
Romesco sauce. We roasted the bell peppers for the sauce over the flame and then steamed them and peeled them. Yummm. I was in charge of our table’s Romesco sauce, and Chef Ted thought it was excellent, with a good smoky flavor! It’s really not difficult; you process a mixture of almonds, bread, garlic, onions, red bell pepper, dried ancho chili and paprika.

IMG_1782

Grilled pork chop with an ancho chili paste marinade and a grilled cactus (!!) salad. My pork chop was cooked really well, and Chef said I had a great presentation, but I really loved the salad. It was made with a cactus paddle and a poblano pepper, really great flavor and a slow working heat.

IMG_1789 IMG_1790

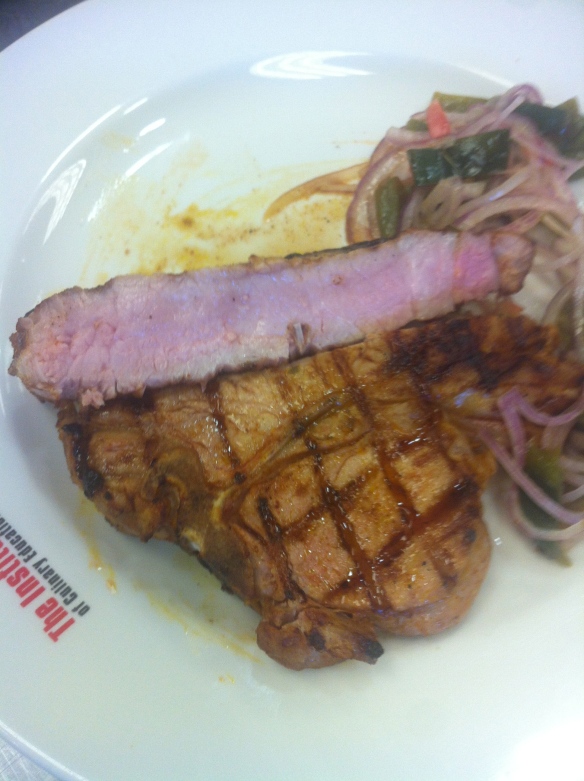
Grilled ribeye with a béarnaise sauce. I mean there’s not much to say here, except that I aggressively devoured my steak in the course of about three minutes. There was nothing to bring home but scraps. Tee hee. Just so you know, the slices were Chef Ted checking the doneness, not my exuberance for eating halted by photography.

IMG_1786

Australia Day Lamingtons

Happy ‘Straya Day!

32145247lamingtons-jpg

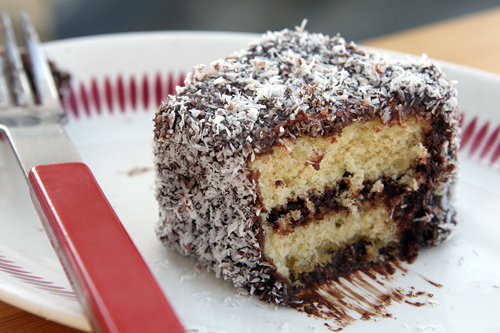
To celebrate, I’ve attempted to make Lamingtons. For the uninitiated, these are square sponge cakes coated in chocolate icing and desiccated coconut, served with (whipped) cream and strawberry jam. New Yorkers can find some delightful Lamingtons at Public, on Elizabeth St.

lamingtons cross section

As I sit here on the couch waiting for my “Lamingtons” to bake, I realize that is not what I made. I have made a cake. As in, dense birthday cake, not light and fluffy sponges. Hence the recipe name “Lamington Cake”, as I read it after the fact. I didn’t really think about it until I was elbow deep in butter and sugar, and I started thinking about how what I was making wasn’t going to turn into what I was imagining. I do have a tendency to not really read through recipes before I print them and head off to the store. Haha, luckily I’ve bought pre-made pies and sausage rolls from the Tuck Shop, so I hopefully won’t mess those up when I bake them.

IMG_1698Inherent design flaw aside, I’ve had an interesting experience figuring my way through Aussie measurements and ingredients. I didn’t really consider the possibility that 1 US cup wouldn’t equal 1 Aussie cup until I was converting grams of butter into cups of butter and I stumbled across a very helpful website that listed ALL the conversions, for milk, sugar, butter, flour (dry cups, liquid cups, grams). Ohhhhh dear, were my thoughts, as I panicked through the rest of the ingredients. I ended up with funky conversions: 1.76 American cups of sugar, 2.8 cups flour, 1 and approximately 2/3 sticks of butter. Luckily my liquid measurer had milliliter markings, so there wasn’t anything too hard about pouring out 250ml of milk.

I also had some ingredient interpretation to do, and why I didn’t do it before I left for Whole Foods, I’m not quite sure. A quick google in the store for “caster sugar” gave me table sugar. Okay, nice, I had that. The baking conversions website I’d found once I’d gotten home said that caster sugar = superfine sugar. Oh, this keeps getting better… baking is meant to be about precision and the combination of just the right ingredients right? My journey was not taking that shape. When I didn’t see self-raising flour on the shelves I turned to google again and found with relief I could just create my own by adding  baking powder and salt. Phewf. And I learned something!

If only I’d been so lucky with “thickened cream”. I had assumed, incorrectly, that it was the same as heavy whipping cream. Google says this isn’t the case, as thickened cream has gelatin in it. Damnit! This was not something I really wanted to contend with, and kept googling until I found the answer I wanted: heavy whipping cream would be fine.

So once I had ingredient substitutions and measurement quandaries sorted, I began following the recipe. I quote, “process butter and sugar in a processor for 2 minutes until light… add eggs one at a time, pulsing…” When I read this, it sounded to me like I needed my food processor. Strange, but then again, you make pie crusts with your food processor.  After watching my butter and sugar get stuck and seeing the blade in my processor not really having much effect, I determined that what they really meant was  a mixer.  I asked Mike, the resident Australian, but he didn’t know, as supposedly his cooking career had started (and ended?) in London. I ran this all past Beth, and she agreed, mixing butter and sugar was meant to be done with a mixer, not my food processor. This was, by now, comedy.

Upon moving my butter and sugar mix to a bowl, I was able to successfully combine all of the components together, and get them into the oven. Victory!

And here is my finished product.

IMG_1702

Yes, my friends, that is a cake. Lamington cake.

I’ve created a monster!

Sooo I was spoiled this past birthday of mine. Among my other prezzies, Bethie got me an ice cream maker!!!! Ever since my darling brother made amazing vanilla ice cream at the big dinner at home, I’ve been like a crack addict devising plans on how to get my mitts on some more.

Enter Beth. I guess I must have mentioned my desires around Beth or else she has ESP(N). This last Wednesday she gave me a brand spankin’ new red Cuisinart ice cream maker and – drumroll please – the Ben & Jerry’s ice cream book!!! Ahhhhhh!!!! Now, I knew about the ice cream maker, but the recipe book was a surprise, so on Tuesday, I’d emailed my brother for his divine ice cream recipe. He kindly obliged and sent it over. Now, I admit that I have a bad habit of reading recipes and only really reading through the ingredients, skimming the instructions. There have been a couple instances where I haven’t planned on the amount of time a dish will take (New Years Eve, I didn’t see that the bolognese sauce needed a couple of hours, we ate about when the ball dropped, oops), or certain cook ware/utensils  are required that don’t exist in my kitchen. I did it again. I looked at the ingredients, many I already had at home, others were easy, like the heavy whipping cream and the whole milk. The vanilla beans were easy too, Whole Foods had three different types, but it was like the pine nuts scenario all over again. For two, yes, as in uno, dos, they wanted $14!!! But if it meant I could have that divine, sweet, creamy, cold ice cream, it was a sacrifice I’d have to make.

But then I got home and read the directions. It’s a custard ice cream. There is a lot of heating and cooling and re-heating and re-cooling that even now I”m not sure exactly what I was supposed to be doing. I was a little stressed, but figured my brother would walk me through it. Crap.

Enter Ben & Jerry!!! They are amazing, but I’m sure you all know that! What’s your favorite flavor? Mine is definitely Half Baked. Now the book is a little dated, published in 1987, when Jerry Garcia was still alive to give his stamp of approval on Cherry Garcia, but lets be real – good ice cream is good ice cream, there’s not a lot technology can do to change it. The ingredients are simple: sugar, milk, heavy cream and eggs. The steps were a lot easier from Ben & Jerry, and I only had four eggs, and the recipe from Matt needs five, Ben & Jerry’s two.

Now the trick is to remember to make sure the freezer bowl has been in the freezer per the manufacturing instructions (16-24 hours). I forgot, so I couldn’t make my delicious treat on Thursday, and had to wait until Friday. The user guide that came with the maker gives the following guidance, which could end up being dangerous: For the most convenient frozen desserts and drinks, leave your freezer bowl in the freezer at all times. Did you read that people? At all times.

I was originally going to make French Vanilla ice cream, but flipping through the pages of B&J, I realized I had raspberries and nectaries that I could use. YUM! Here’s the recipe I made:

Nectarine and Raspberry Ice Cream

1 cup finely chopped ripe nectarines

1 pint fresh raspberries

Juice of 1/2 lemon

1 1/4 cups sugar

2 large eggs

2 cups heavy cream

1 cup whole milk

1. Combine the peaches, raspberries, 1/2 cup of the sugar, and the lemon juice together in a bowl. Cover and refrigerate for 2 hours, stirring every 30 minutes.

2. Whisk the eggs in a mixing bowl until light and fluffy, 1 to 2 minutes. Whisk in the remaining 3/4 cup sugar, a little at a time, then continue whisking until completely blended, about 1 minute more. Pour the heavy cream and milk and whisk to blend.

3. Drain the juice from the fruit into the cream mixture and blend.

4. Transfer the mixture to an ice cream maker and freeze following the manufacturer’s instructions. After the ice cream stiffens (about 2-5 minutes before it’s done), add the whole fruit, then continue freezing. If you want a firmer consistency, transfer the ice cream to an airtight container and store in the freezer for two or more hours.

Yum raspberries, nectarine and sugar:

Check out this red, sexy, cold spinning – ice cream maker:

Churning up to make a delicious treat:

Finished ice cream! I love the pink color and the fruit chunks.

Now after reading this do you see the little monster I’ve created? Ice cream is SO easy to make. They tell you to keep the freezer bowl always at the ready. Is this my gateway into obesity? I actually don’t even like ice cream that much, but oh, that heavy cream and sugar is so nice.

Perhaps I better not keep the bowl always frozen.

Summer isn’t over yet!

It’s clear I’ve started to age. I”m officially “late twenties”. And when I log onto Facebook, I don’t see posts about people humorously discovering photos from the night before that they will eventually regret being posted, or posts about how last night was crazy, and tonight’s going to be crazier. No. These days, the posts about big nights out are more of a lament of how our bodies are punishing us for the night before. People are getting engaged/married/pregnant left and right. And I’m learning things about motherhood that I sort of wish I didn’t know yet. Yikes. That being said, there’s some REALLY cute photos that get posted of babies and children. And right now, I’m LOVING the back to school photos and the darling outfits.

But does that mean summer is over already? It just started! So sad right now. But walking down the street today, my mom (yep! she’s in New York!) said she thinks summer goes straight through September! Joy!

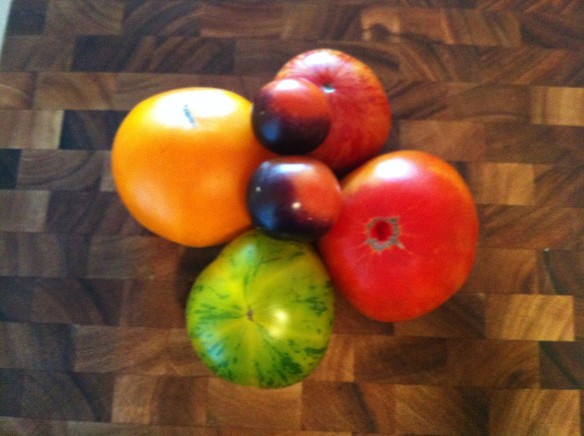
And the farmer market agrees. Tomatoes are still in abundance. Look what I got at the farmers market – so many colors of tomatoes! Purple, orange, green, yellow, and mixed!

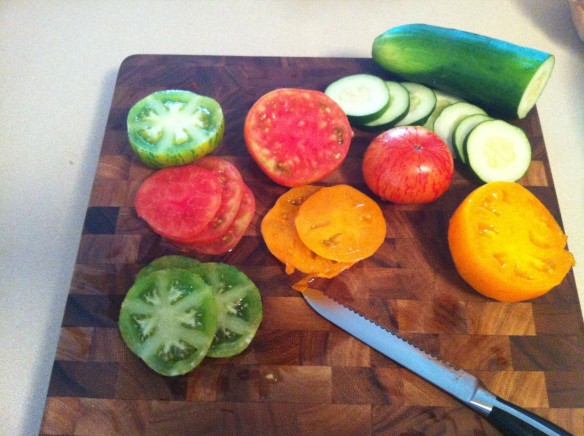
I may have mentioned before that the August cover of Bon Apetit was inspiring so I sliced up my tomatoes. And a cucumber. I ate the orange and purple tomatoes on their own. I couldn’t wait any longer.

And then I sliced a loaf of bread and toasted the slices. I drizzled a little olive oil on the toast, spread on some goats cheese (not too much!) and layered on the tomatoes and cucumber slices. I topped with salt and pepper to finish.

See!? Summer isn’t over yet!

Key lime bonanza!!!

I got the most wonderful present this week:

One of my friends, a “barn mom” from home, Monique, sent me this box from Florida this week!!  After reading about my plight about finding fresh key limes in the city, Monique texted for my address, and about an hour later, I got a message saying the limes were on their way! What a kind gesture! Not that I should be surprised, Monique and her family (I used to babysit her kids, Anders and Liam, now they are in college! Time flies and I am old!) are some of the nicest and kindest people I know. The best part – she sent me a lime squeezer!!

So what to do with four bags of key limes!? Another key lime pie? Hmm. Key lime cheesecake bars? Okay!

I found a recipe on another blog. It was key lime cheesecake with an almond cookie crust. The cheesecake bit was delicious, but the crust was, while not terrible, “not going to win [me] any awards”, in the words of my ever so loving boyfriend. Keep in mind after he said this, he scarfed down three more bars for his dinner. Must not have been too terrible! And my co-workers seemed to like them as well.

Not so hot crust aside, I had a ton of fun making the bars. The fresh lime juice made such a difference compared to the bottled stuff, I loved the cheesecake bit! And I’m sure lucky Monique sent me that juicer – I squeezed and squeezed limes for what seemed like ages to get to my one cup of lime juice – my hands would have been dying!

One bag of key limes down, three to go!

Cheesecake bars coming up soon, but with the traditional graham cracker crust!

Thanks a million Monique!! xxxx